

How to Automate Welcome Messages using Zapier(Slack).
Automating your onboarding process.


I recently completed a task assigned to me, and it took me four days to figure it out after a series of trials. So I decided to write an article about it to make it easy for the next person that will automate sending a welcome message to new users in slack using Zapier.
This article is for community managers trying to onboard new members to their community and anyone who manages a slack workspace.
In this article, we are going to learn
What Zapier is
What Slack is
The steps to set up an automatic welcome message in Zapier
What is Zapier?
Zapier is a product that lets you automate workflows and integrate your day-to-day apps like Slack, Facebook, emails, etc.
You can automate other things, from sending a new message to a channel in slack to adding a new customer to a mailing list to making posts on Facebook and so on.
What is Slack?
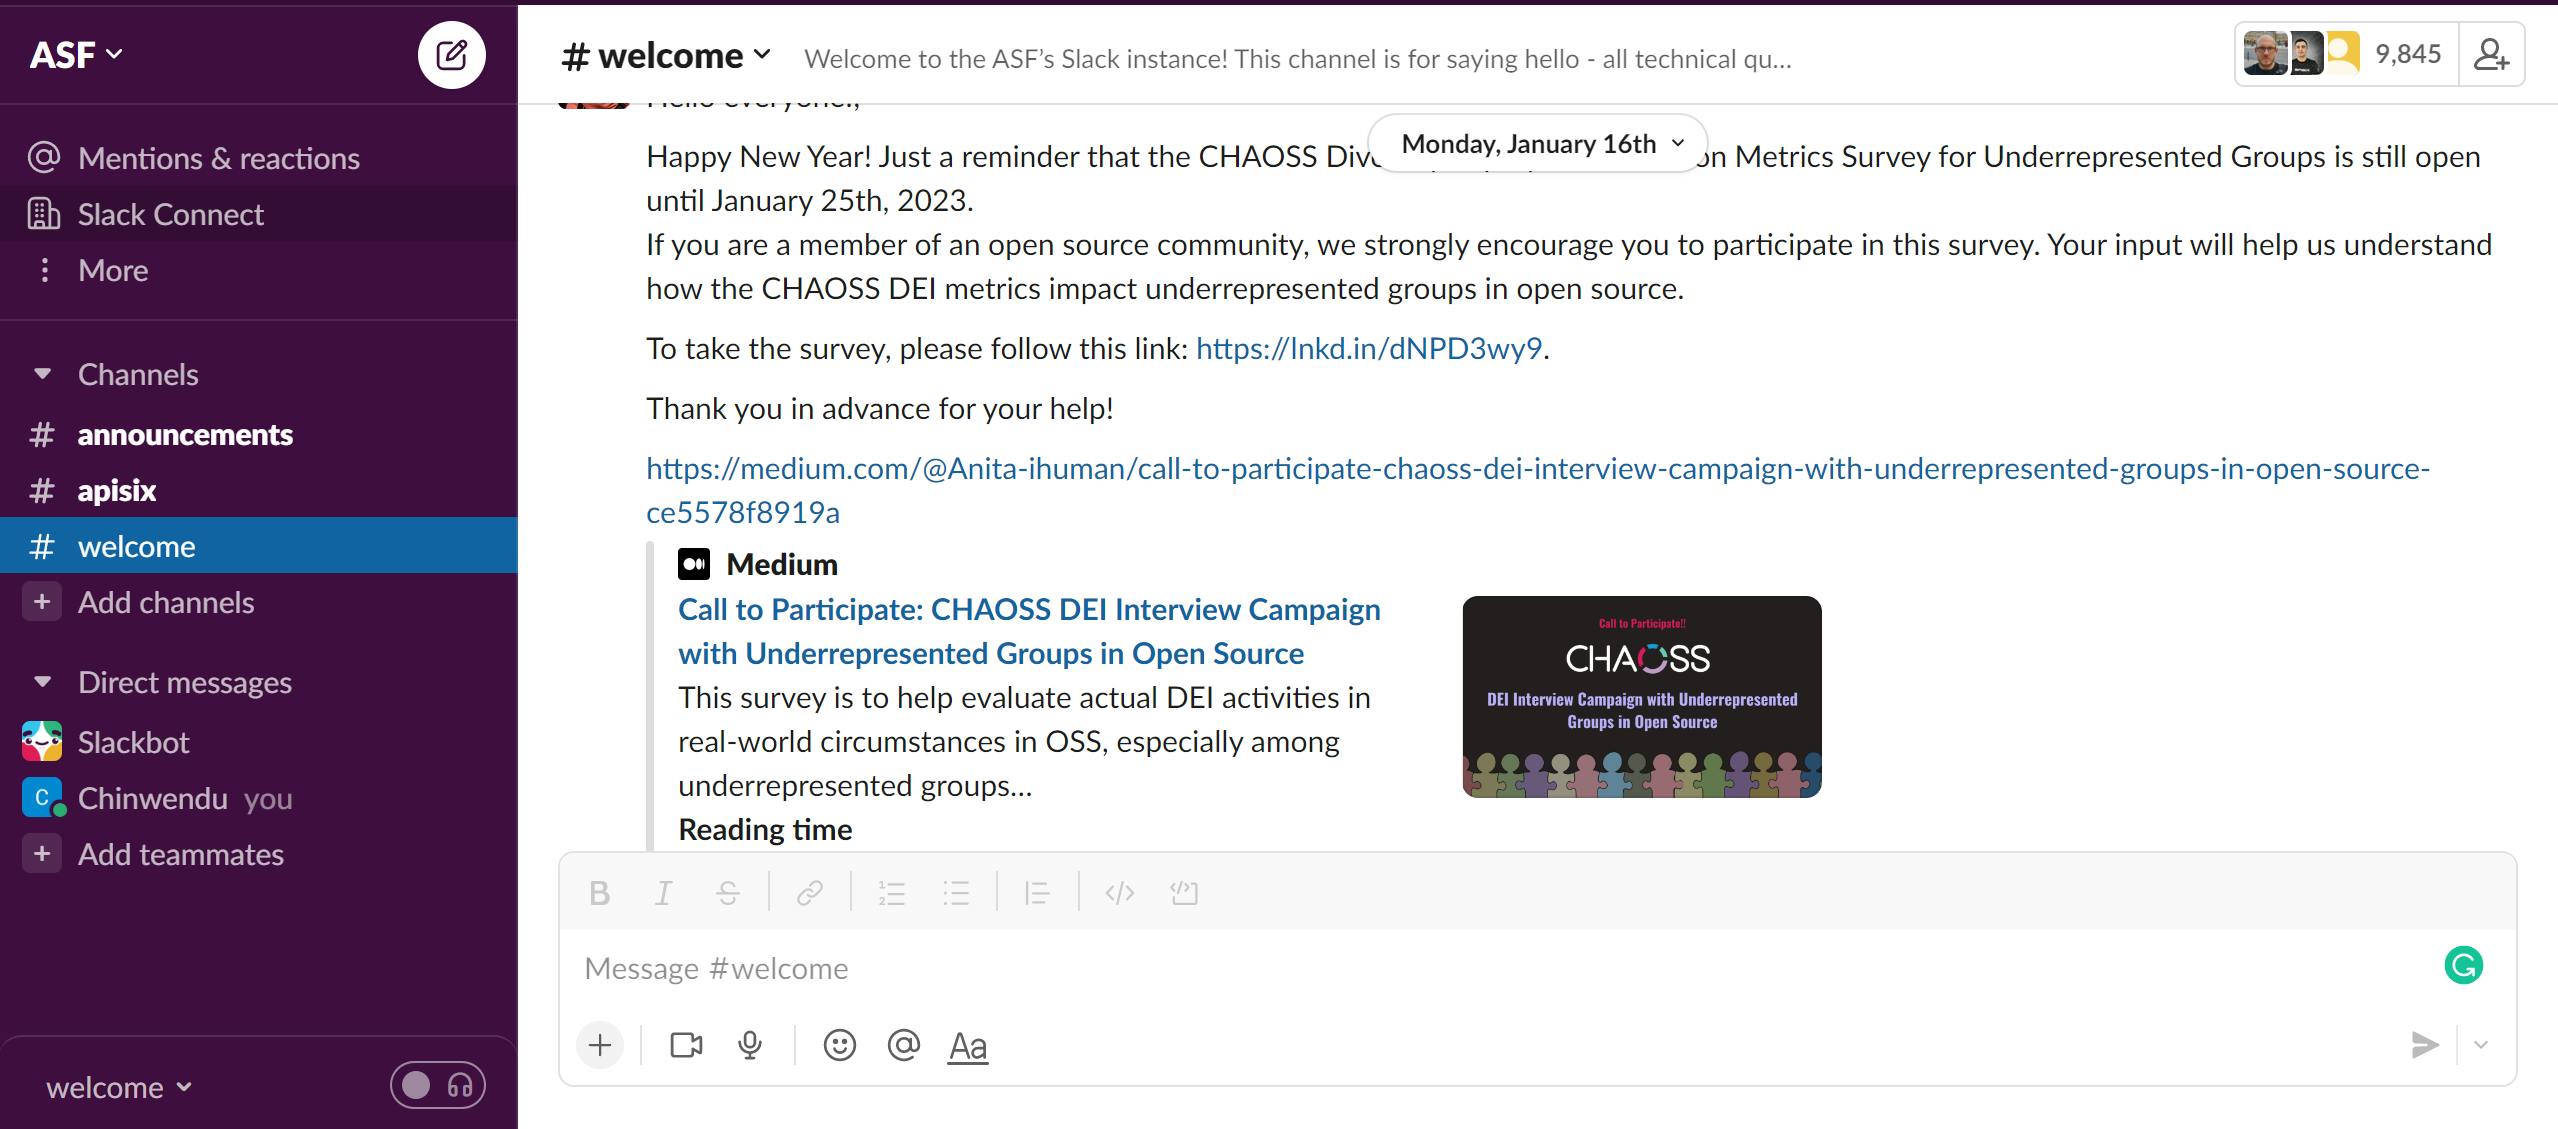
Slack is an online messaging platform that enhances communication among teams and communities. The messages can be voice, text, pictures and so on.
The steps to set up an automatic welcome message in Zapier
New users can join a slack workspace at any time; it is the duty of the workspace moderator to welcome the new user. Imagine that fifty people join a workspace in one day. It will be tedious for the moderator to welcome them individually. As a result, the need to automate the onboarding process arises.
With Zapier, you can automate the onboarding message sent to new users. I will work you through how to set up Zapier so that every new user who joins your workspace gets the onboarding message aautomatically.
Step 1
Create a zapier account and a slack workspace.
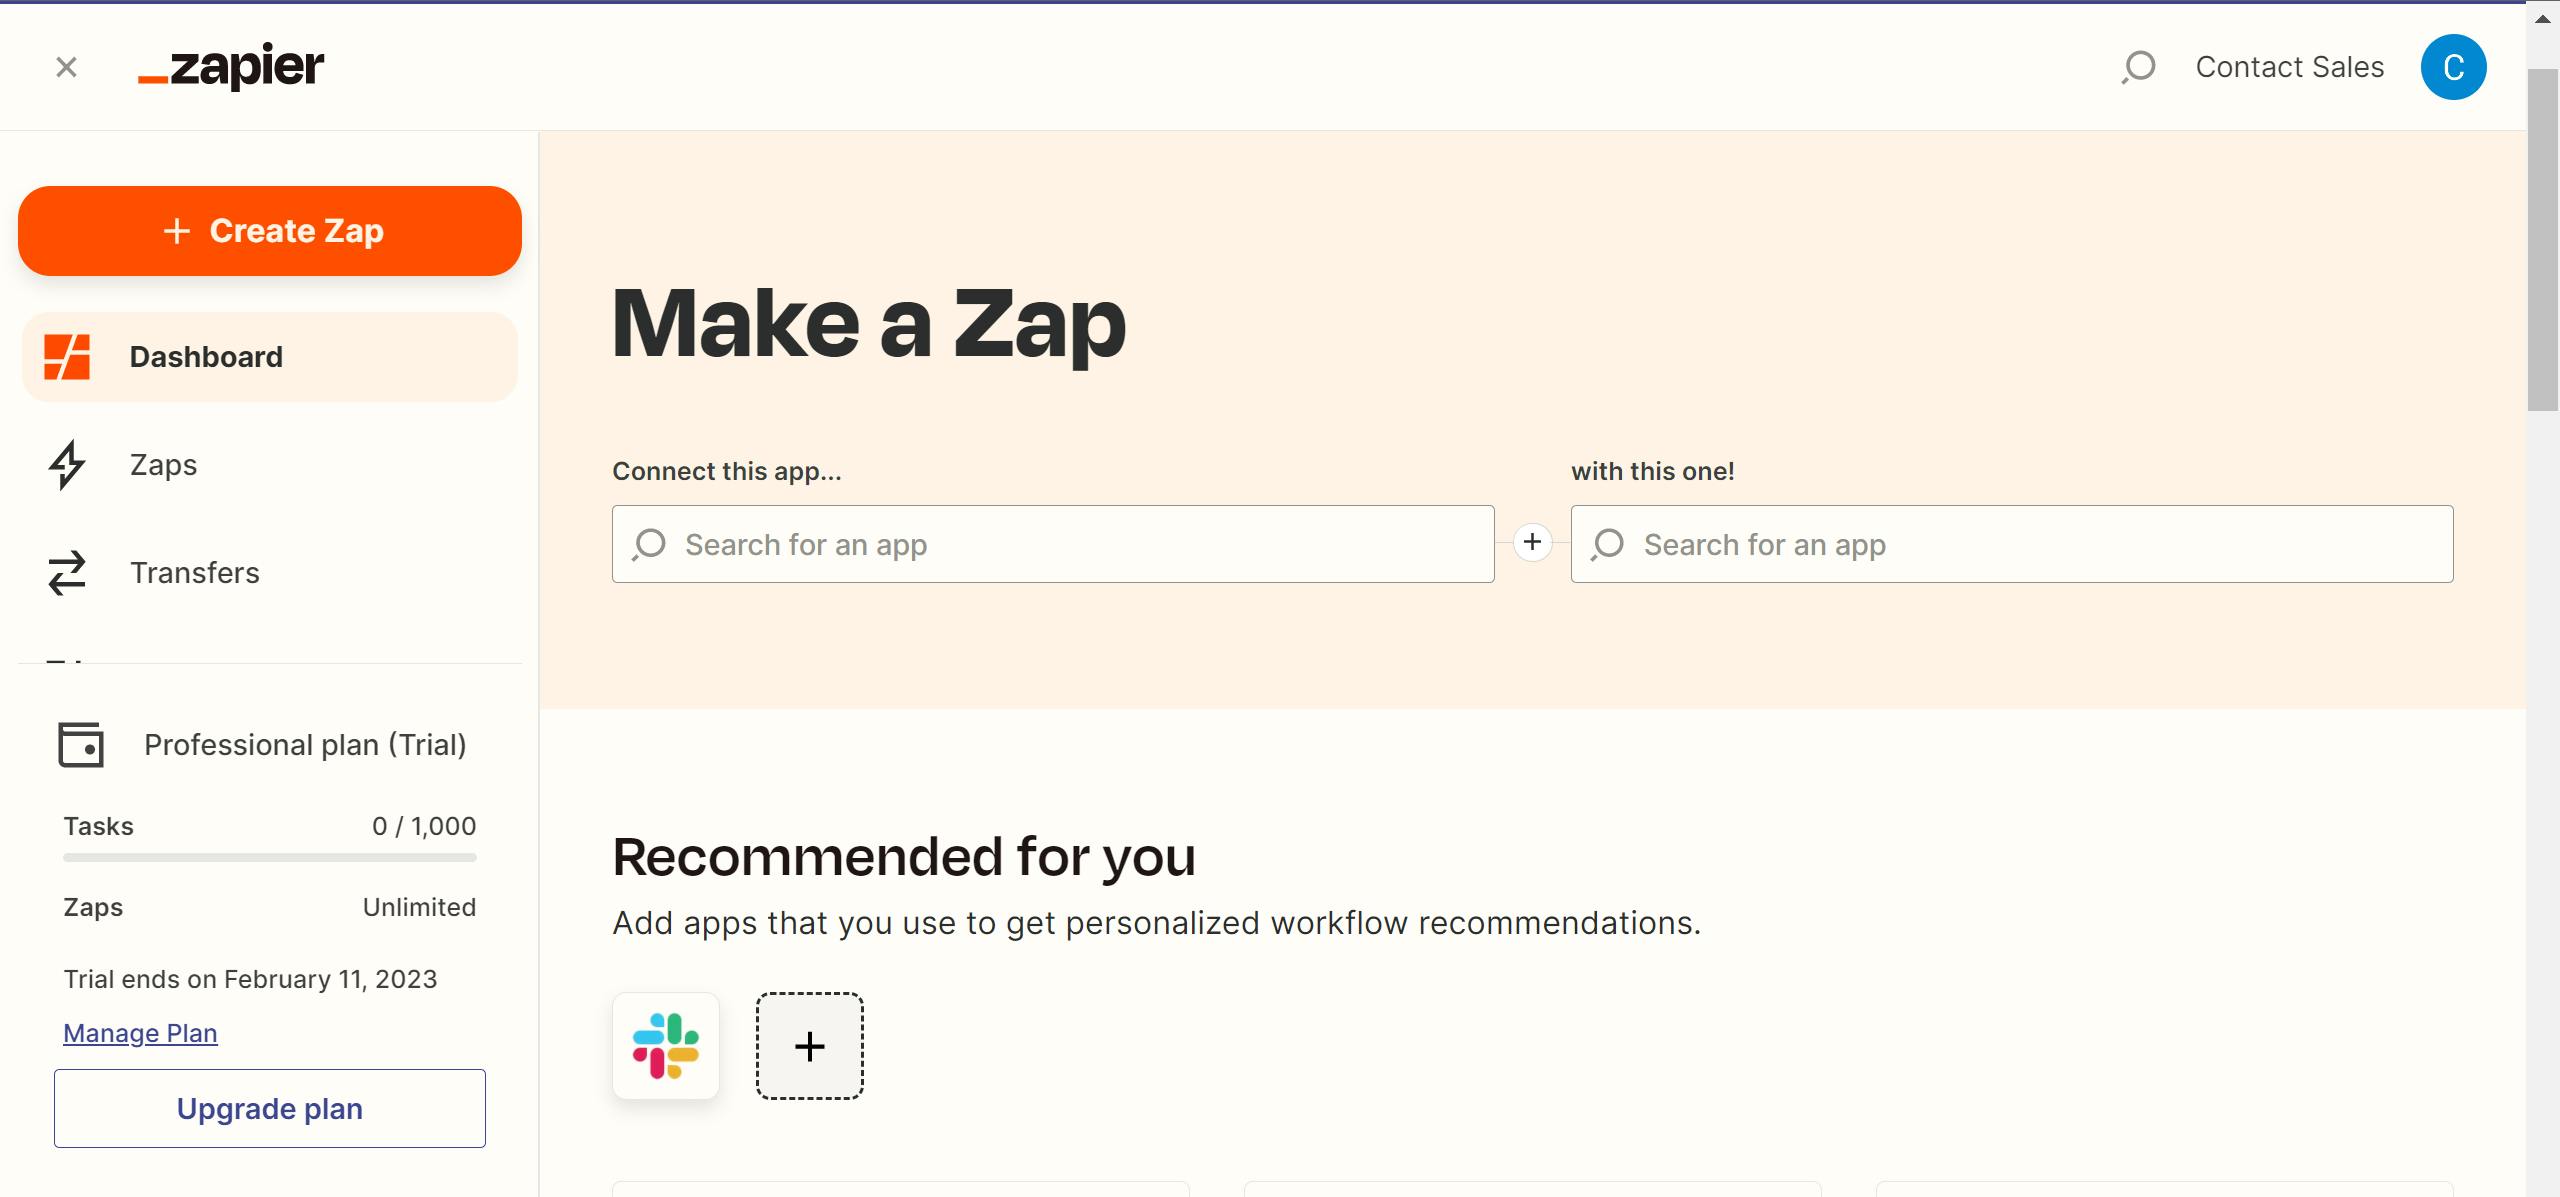
Step 2
After the setup on the Zapier dashboard, select Create Zap
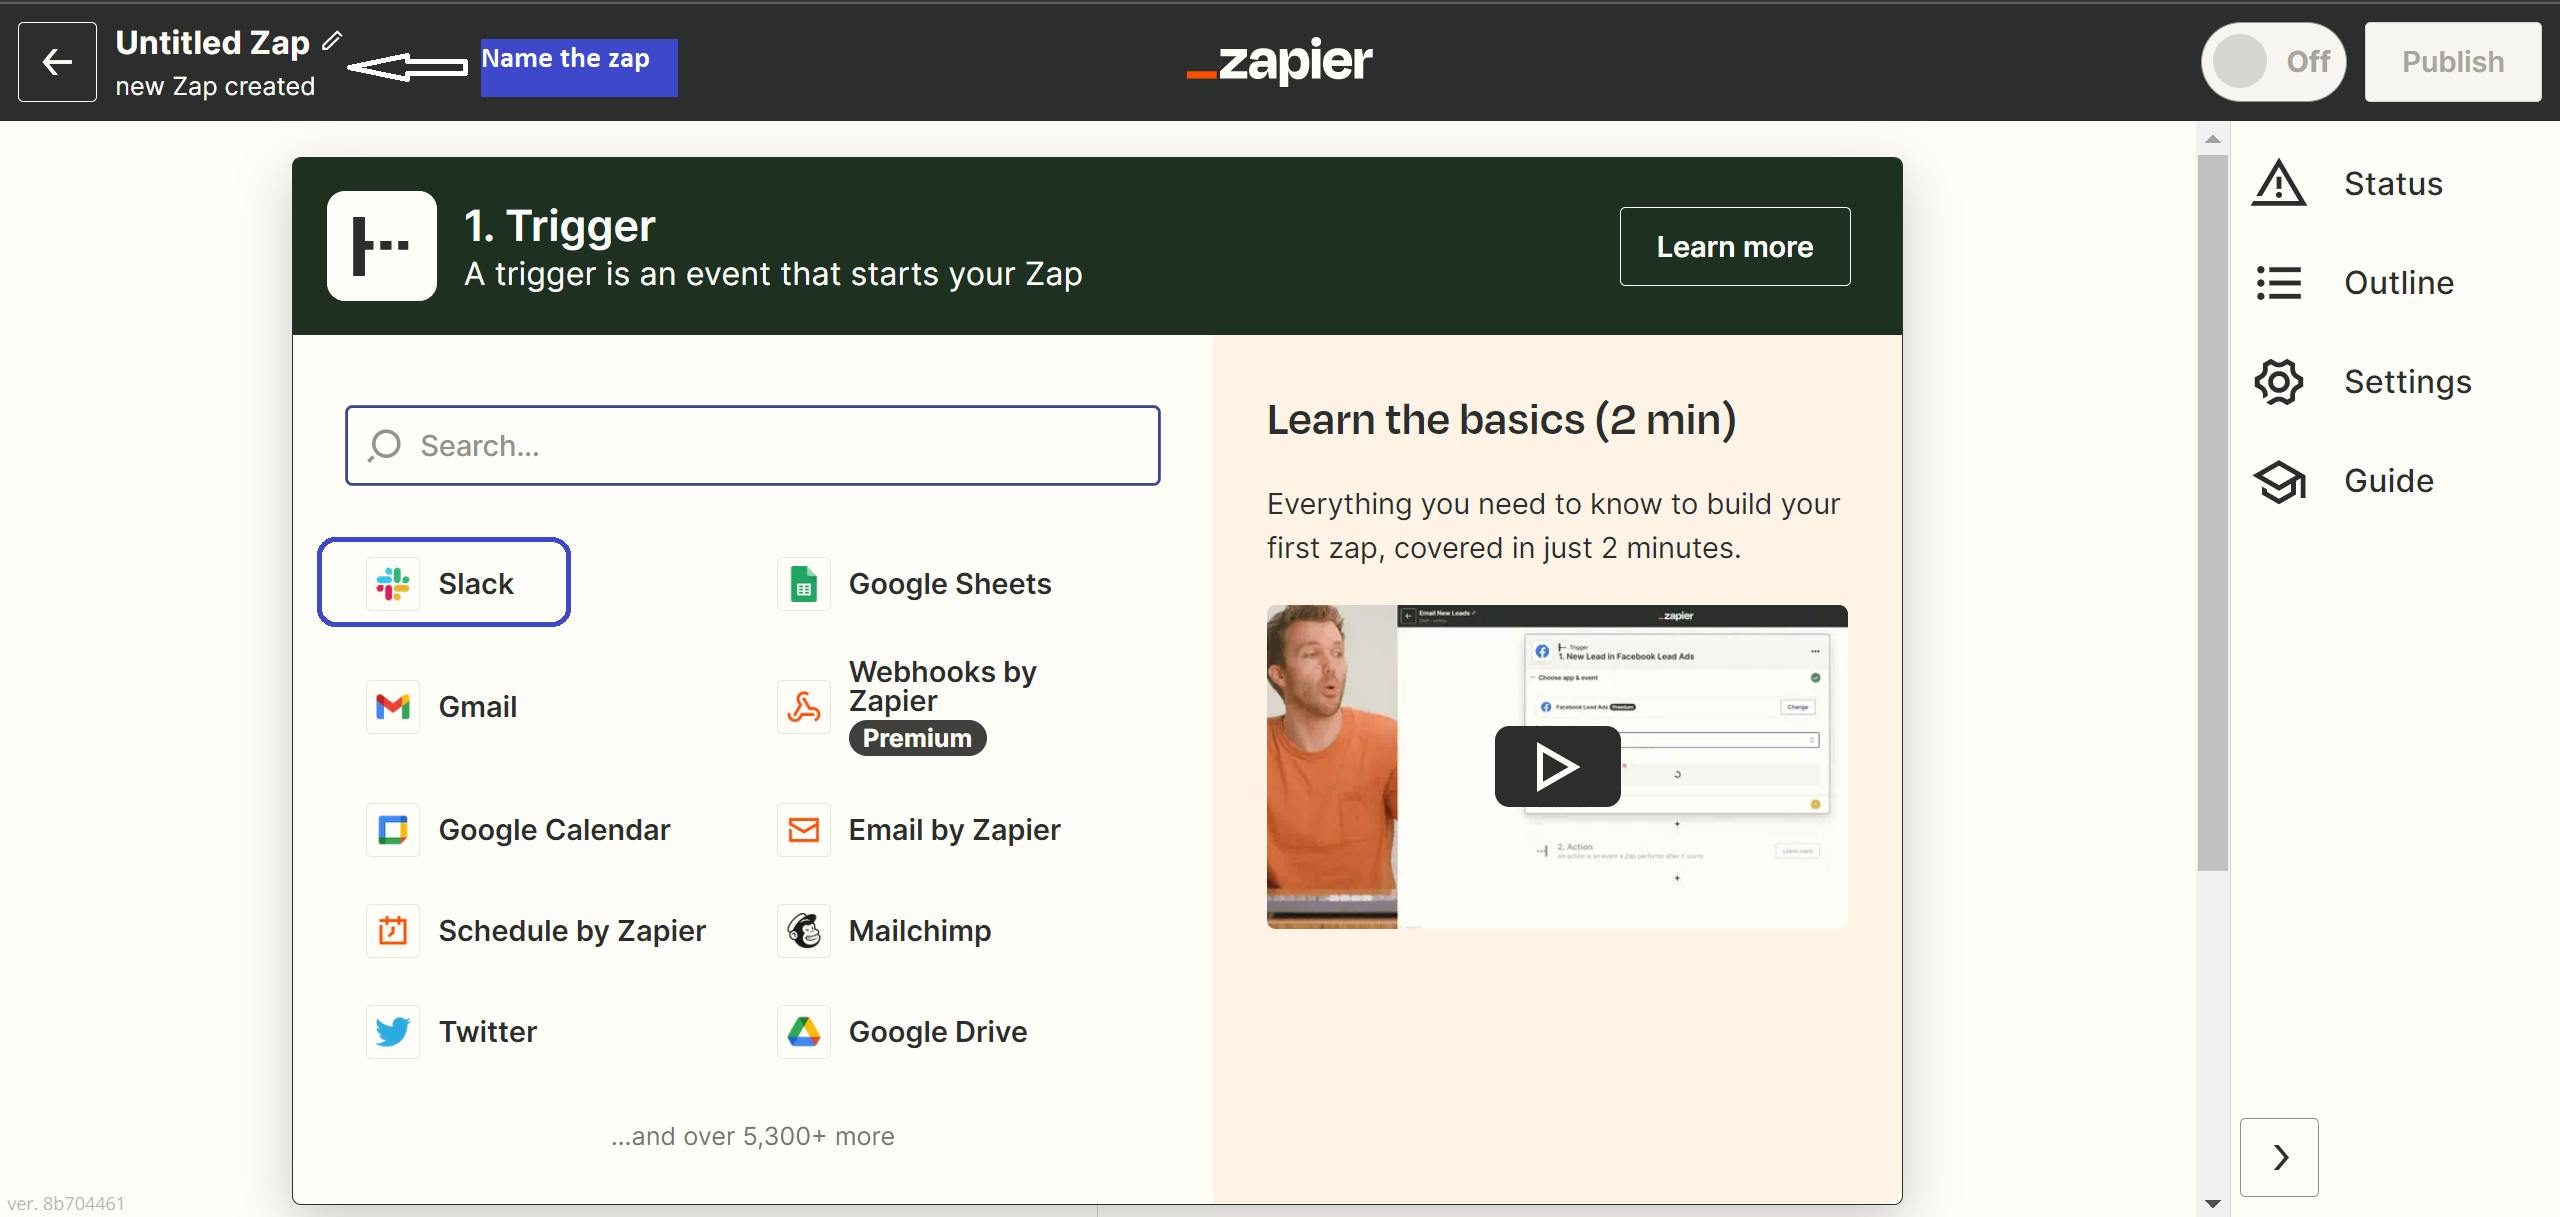
Step 3
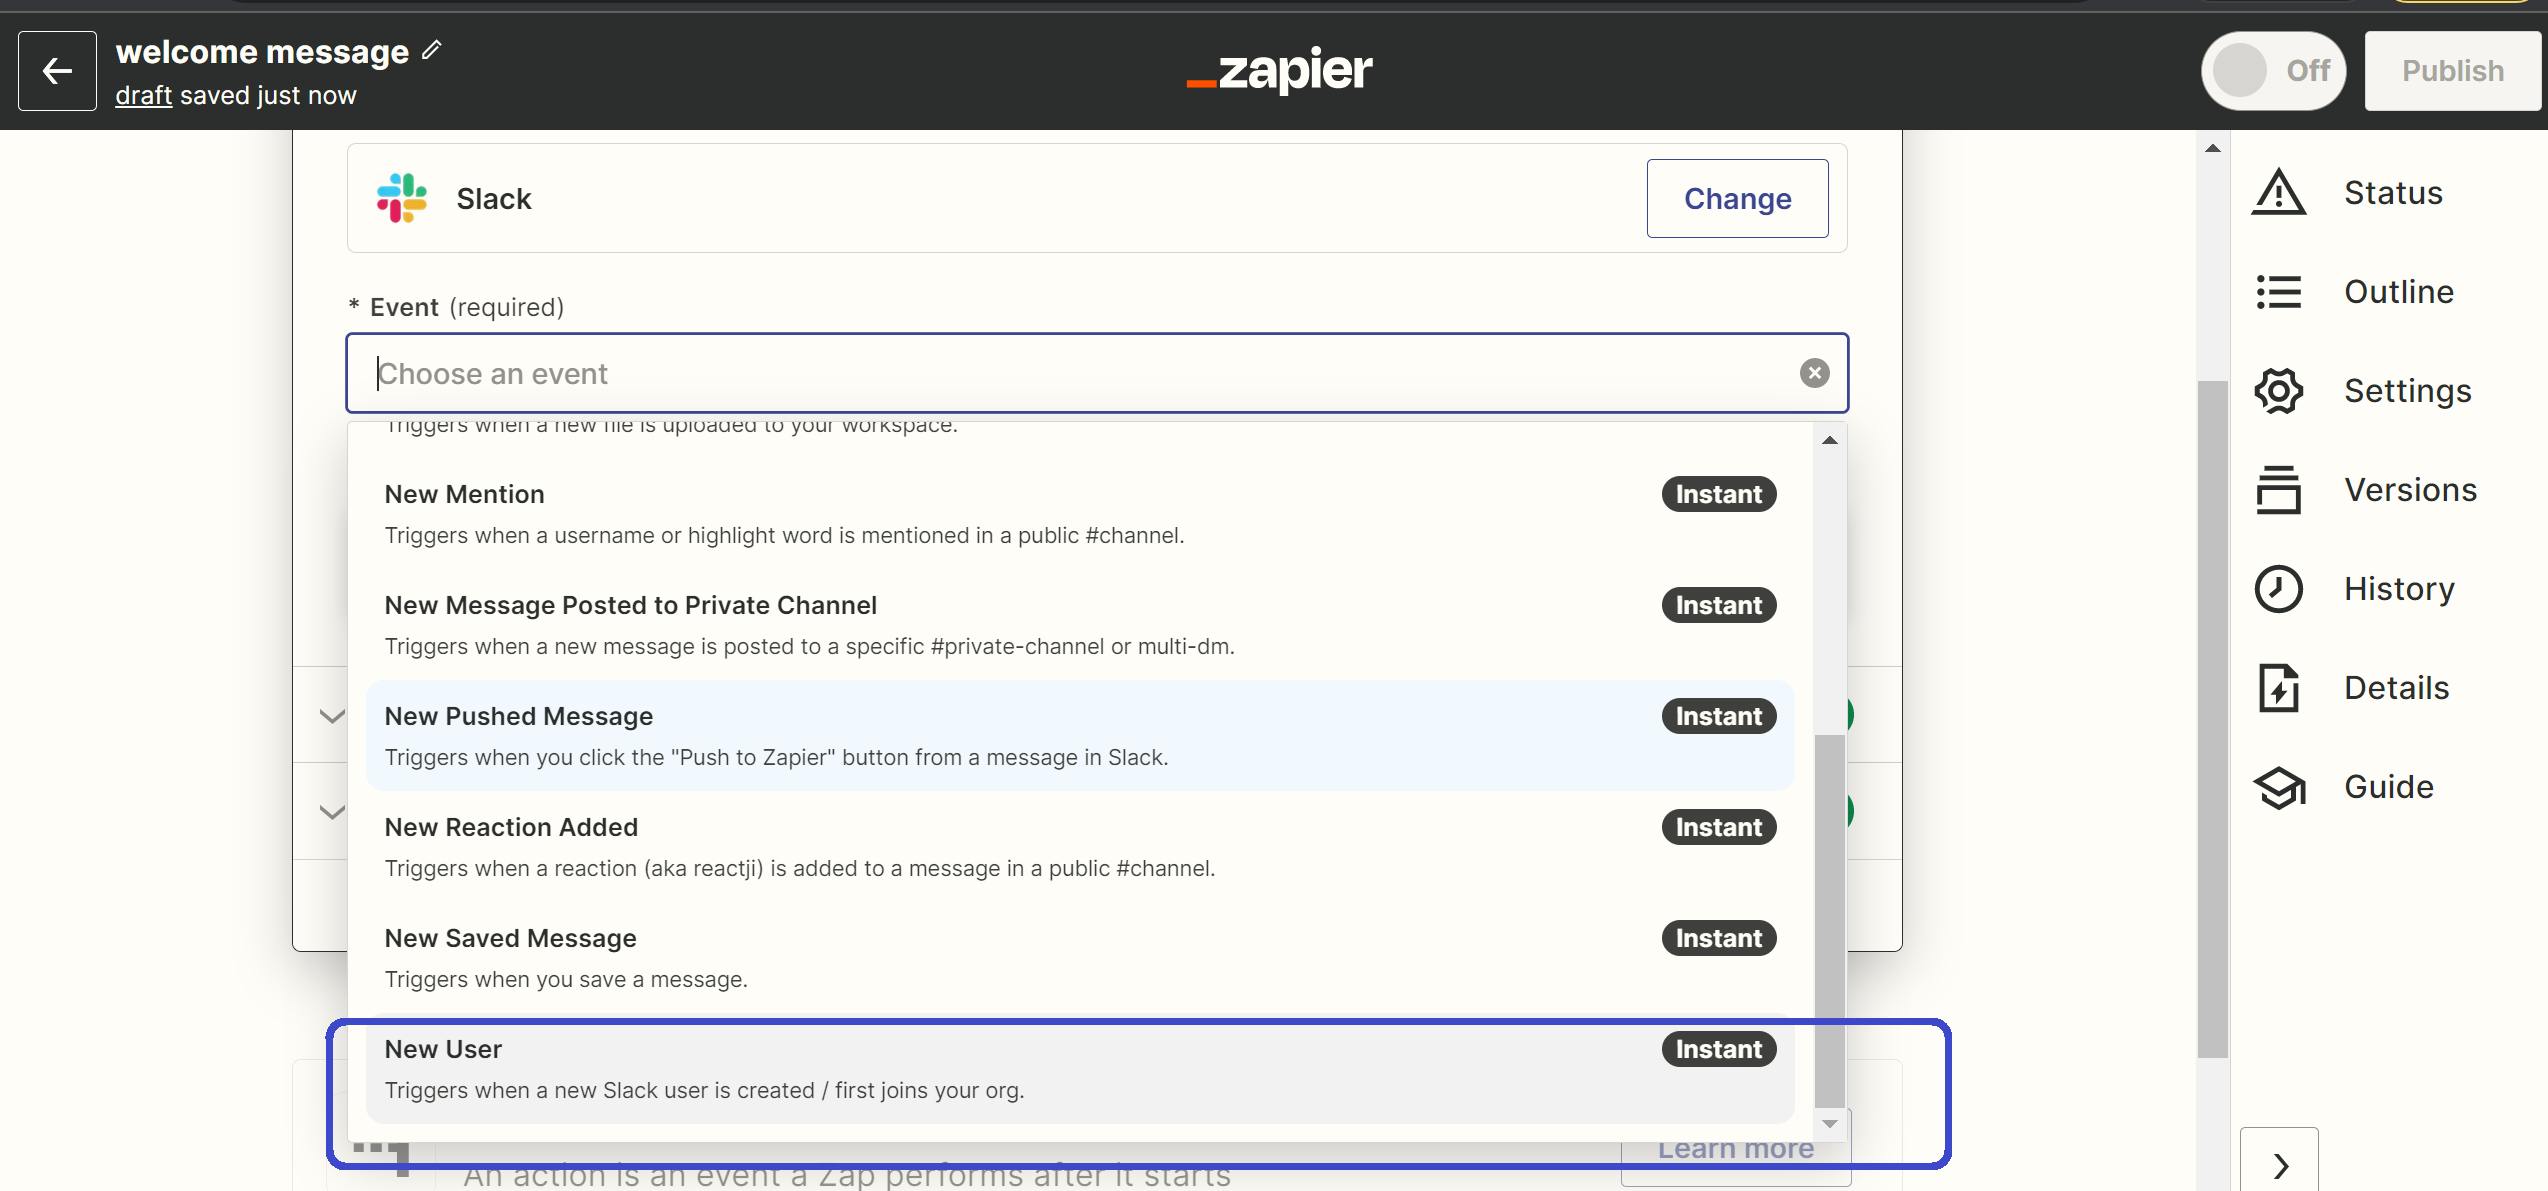
Choose the app you want to work with, in this case, slack, and select the trigger for the zap you are creating, in this case, when a new user joins.
Step 4
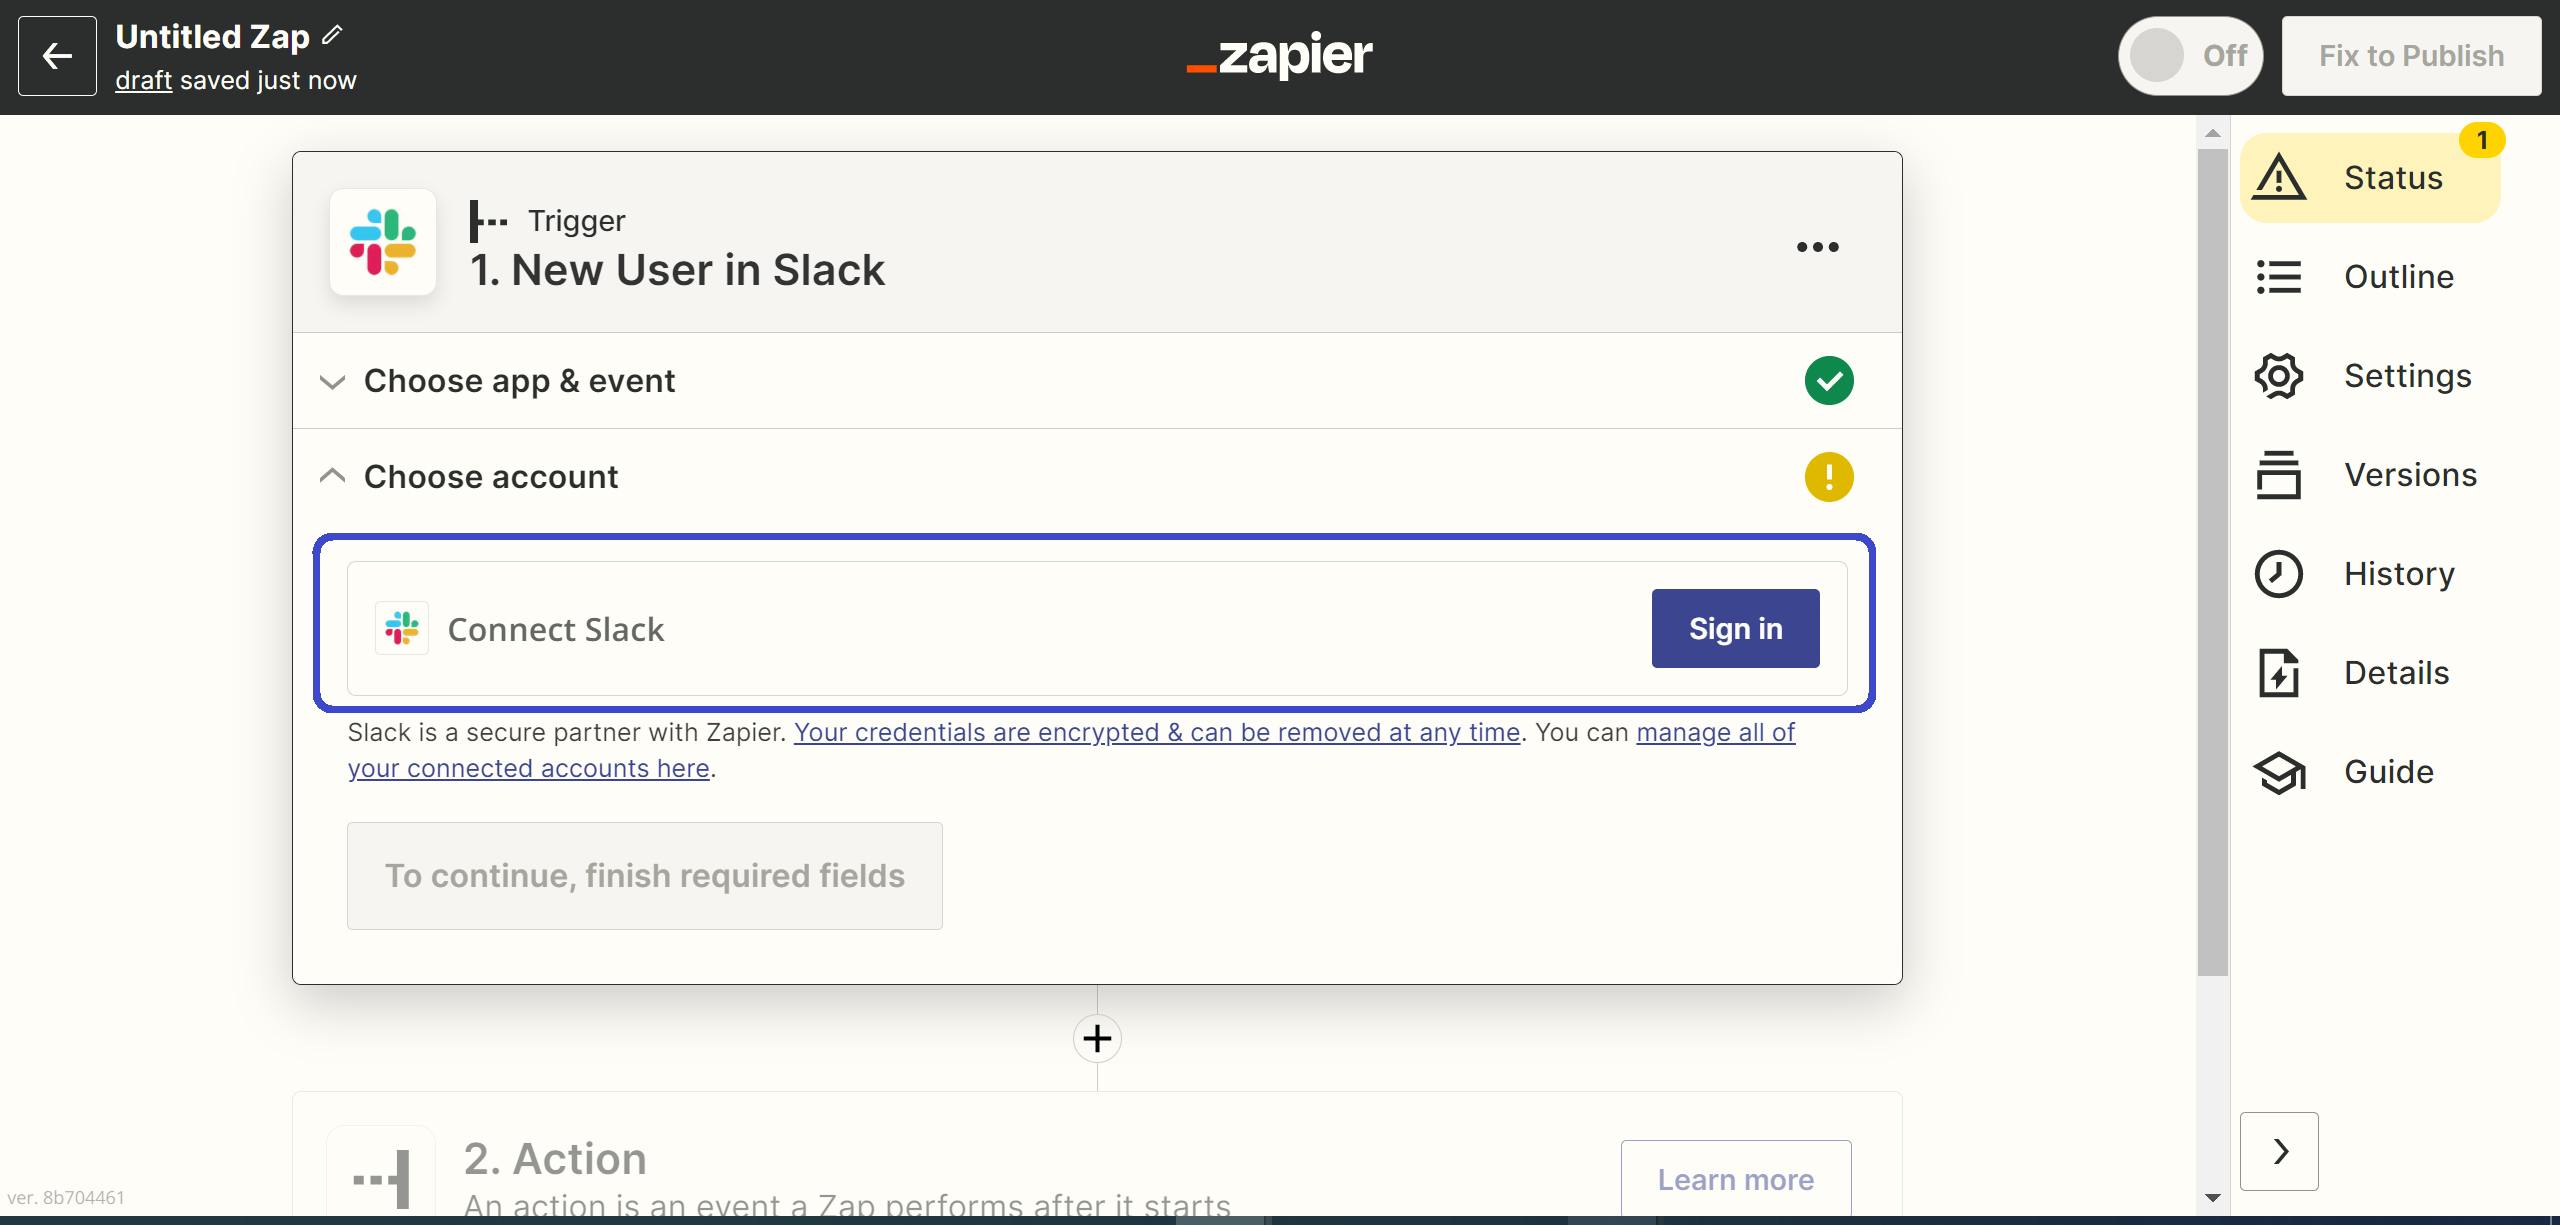
Connect your workspace by signing in to slack, click allow, and test trigger.
Step 5
Click continue and proceed to set up the action that will happen when the zap is triggered.
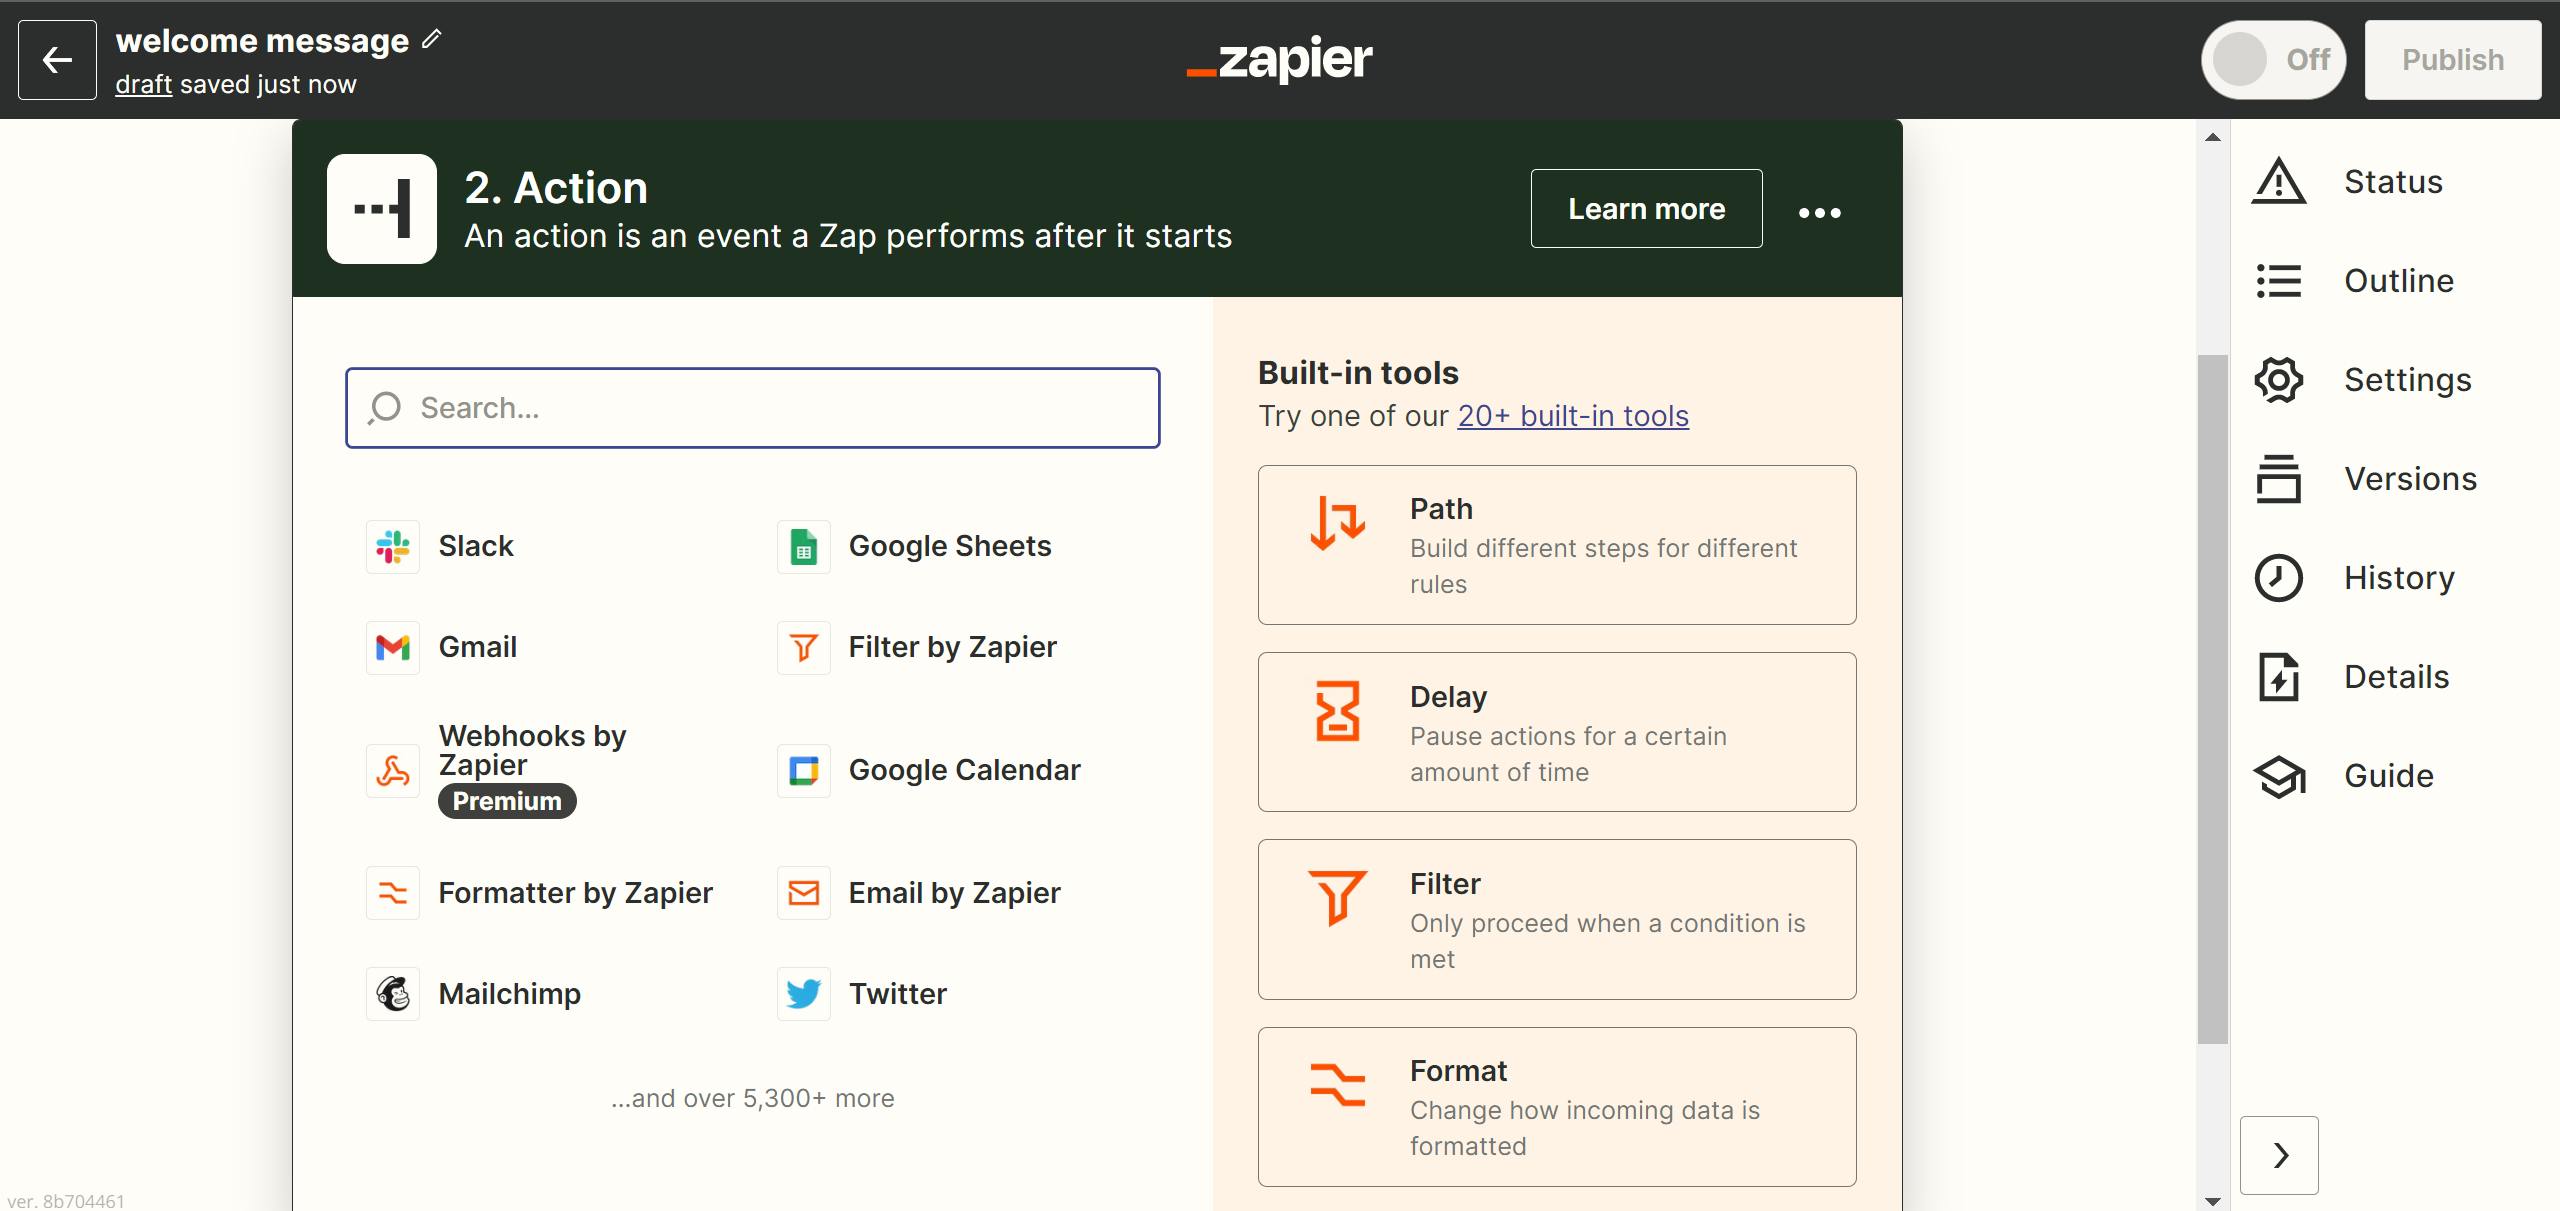
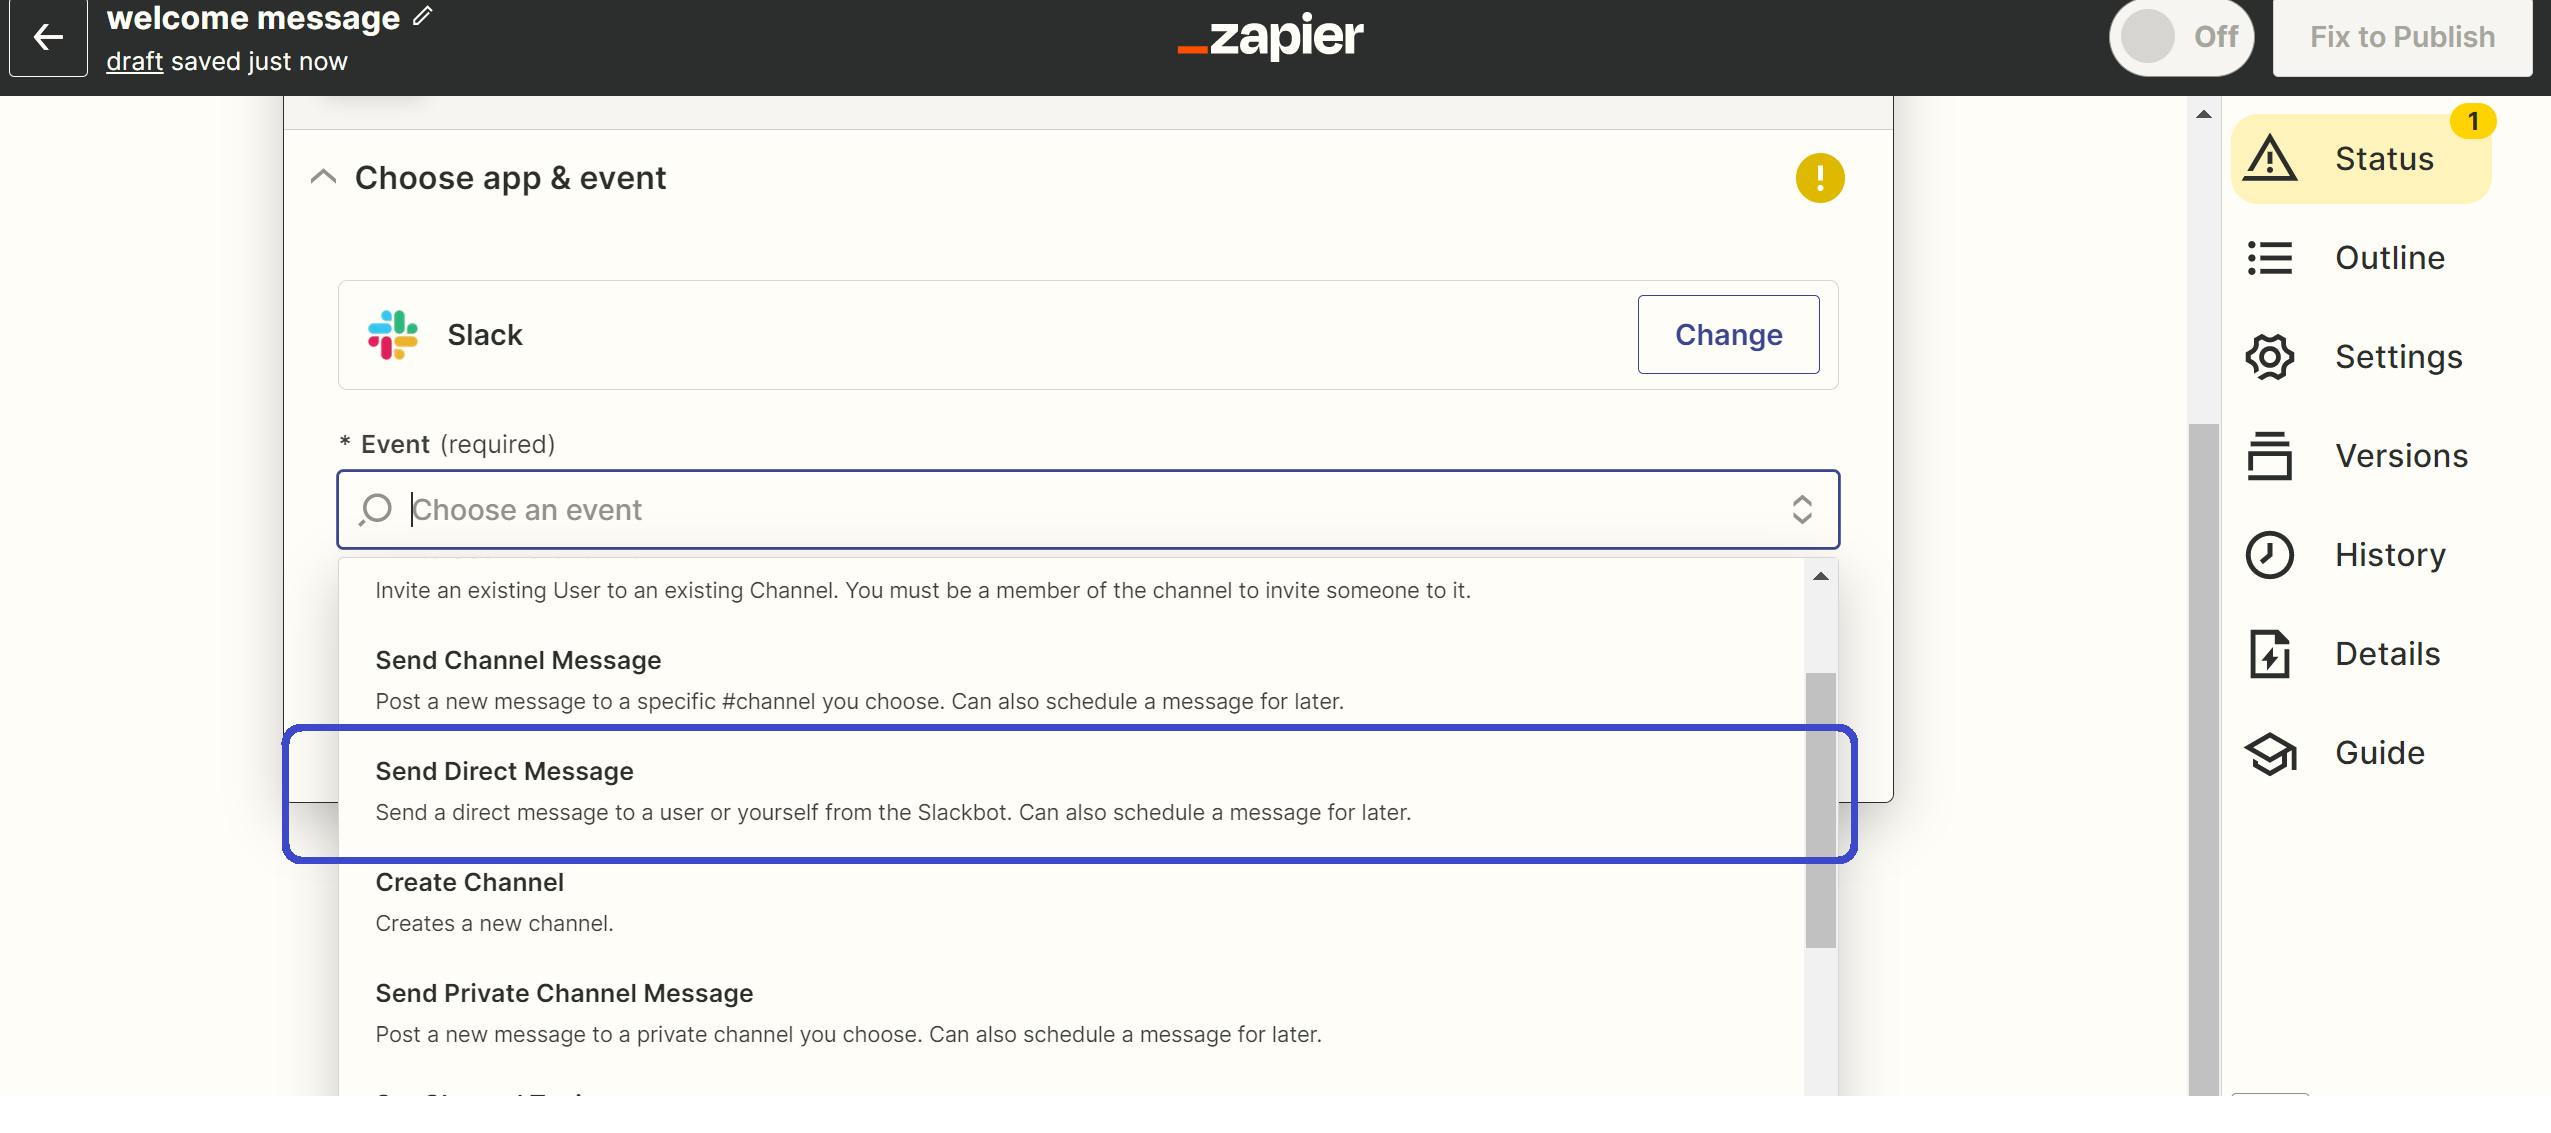
We want to set up welcome message automation, so we select send Direct Message and click continue. Choose the slack account that we signed in to earlier and continue.
Step 6
Proceed to set up the action. This is a breakdown of the options and their meaning.
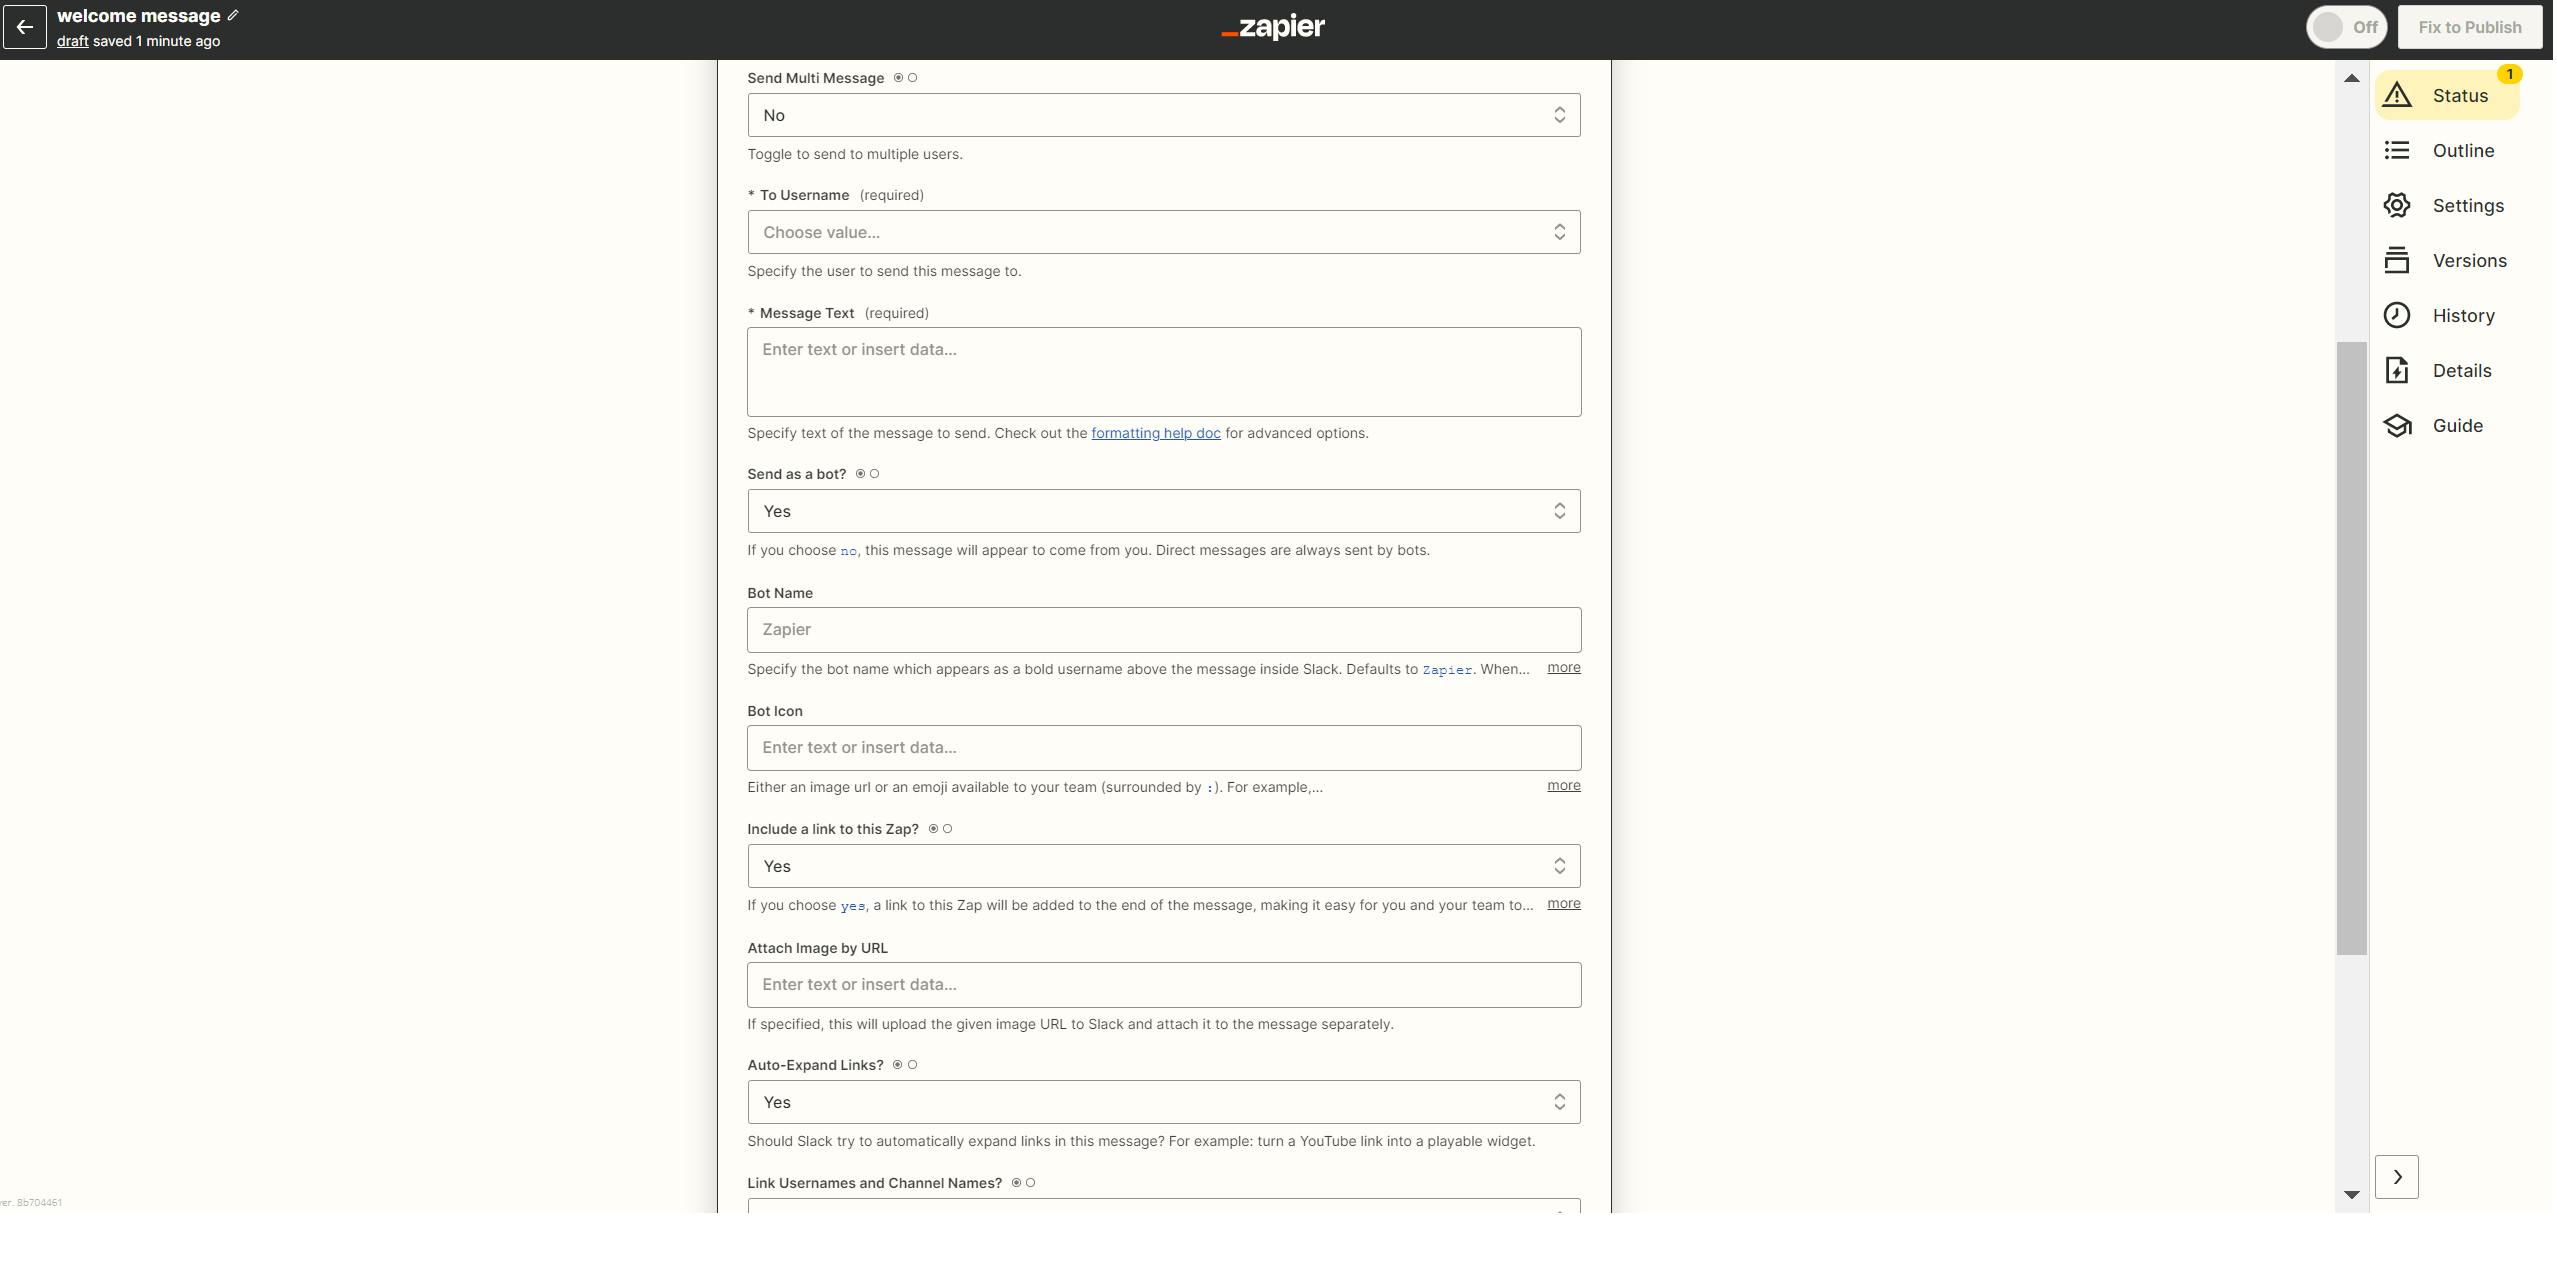
Send Multi Message - Choose whether to send the message to multiple users
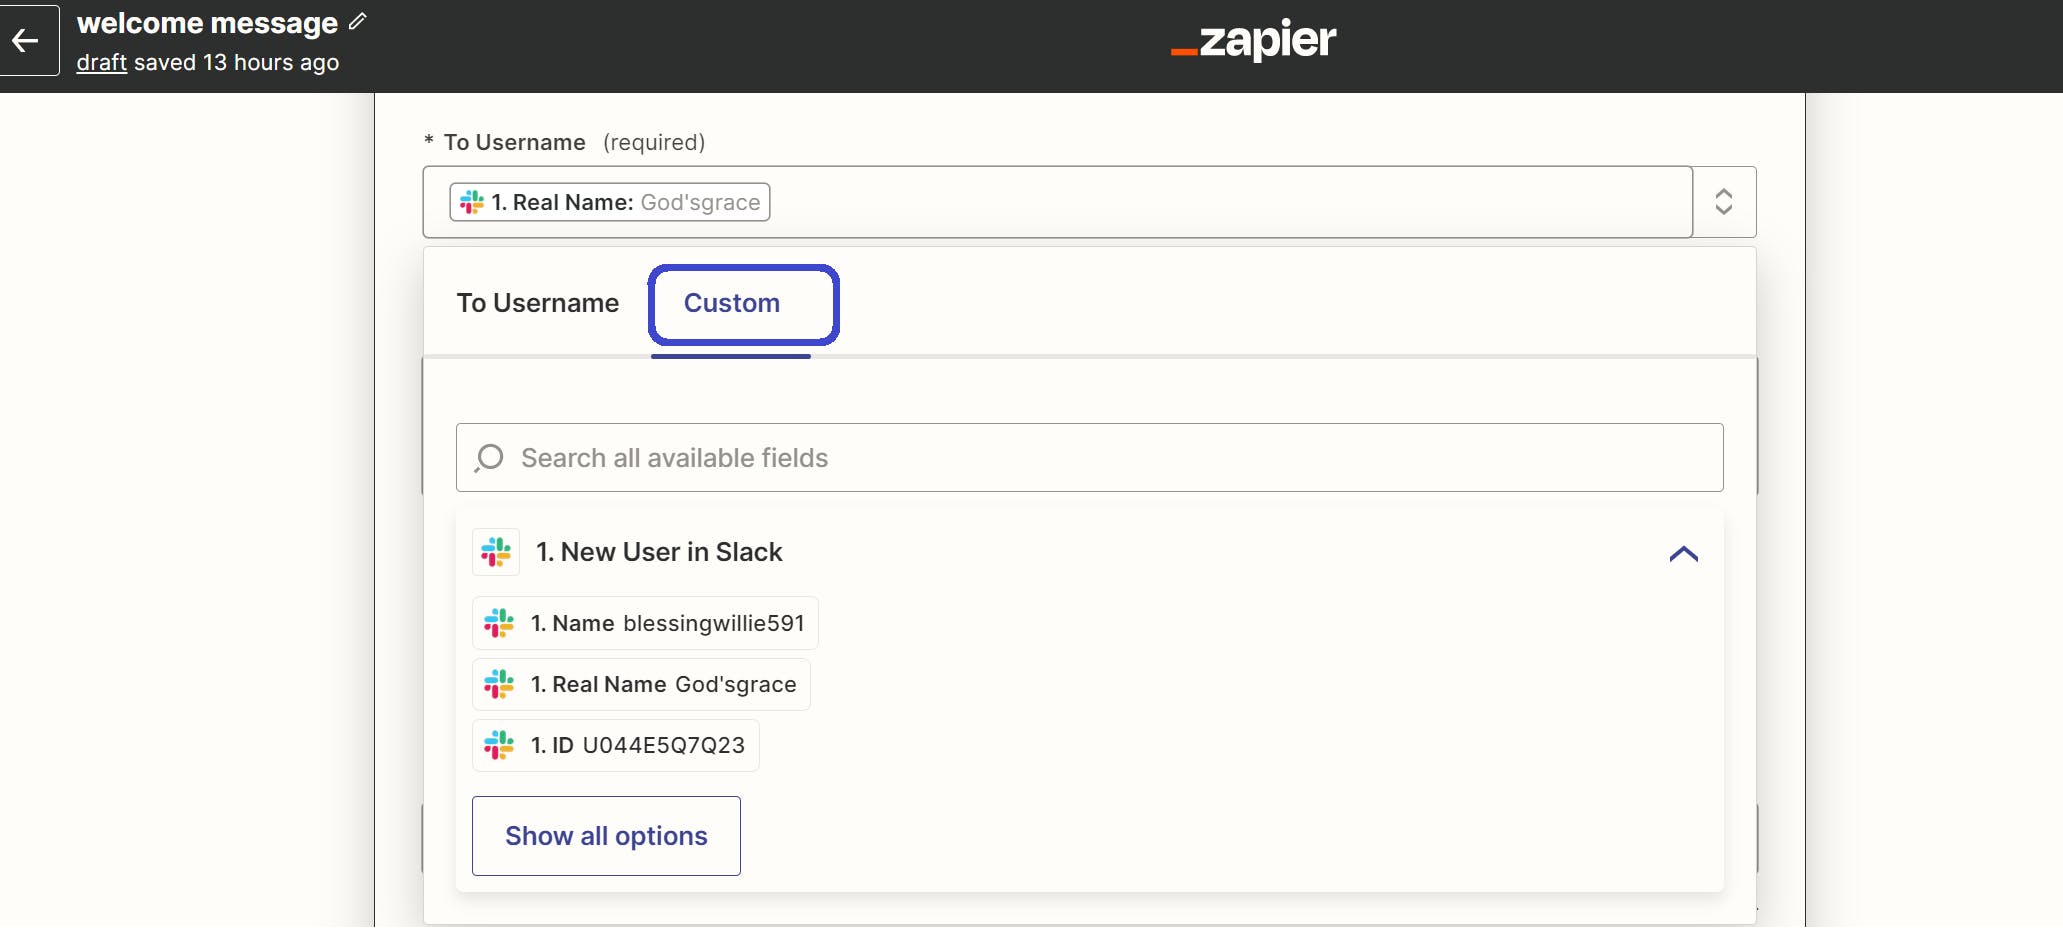
To username - choose the username the message will be sent to; because we want to send it to any new user who joins, we will use a placeholder for the username. This placeholder can be found in the dropdown that shows under Custom (see screenshot for details)
Message Text - This is the message you want to send to the new user. You can format the text here as you desire, and there is room for Placeholders should you want to personalize the message with the user's name.
Send as a Bot - This is to select how the message will appear, either as a human or a bot.
Bot Name - This is the name of the bot sending the message. It appears as the sender's name when the message is sent. It can be anything, e.g., Welcome to TxE Africa.
Bot Icon - This is the icon associated with the message when it is sent. This can be an emoji formatted as ":emoji_name:" or the URL to a picture.
Include a link to this zap - In zapier you can add a link to each message; this can be useful when you want to edit the zap.
Attach image by URL - Attaches the image at the URL provided to the message separately.
Auto-expand links - When you embed links in your message, slack automatically creates a preview of the link; with this option, you can disable slack from expanding such links.
Link usernames and Channel names? - This option lets you link usernames and channel names in your message. This is useful if you want to refer new users to a specific channel.
Schedule At? - You can decide when your message will be sent. It can be anytime, not more than 120 days from when the zap is created.

When you are done customising the options, select continue and test the zap you just created.
If you are satisfied with the message you received as a test, you can publish the zap.
Congratulations 🎉you just automated part of your organisation's onboarding process.
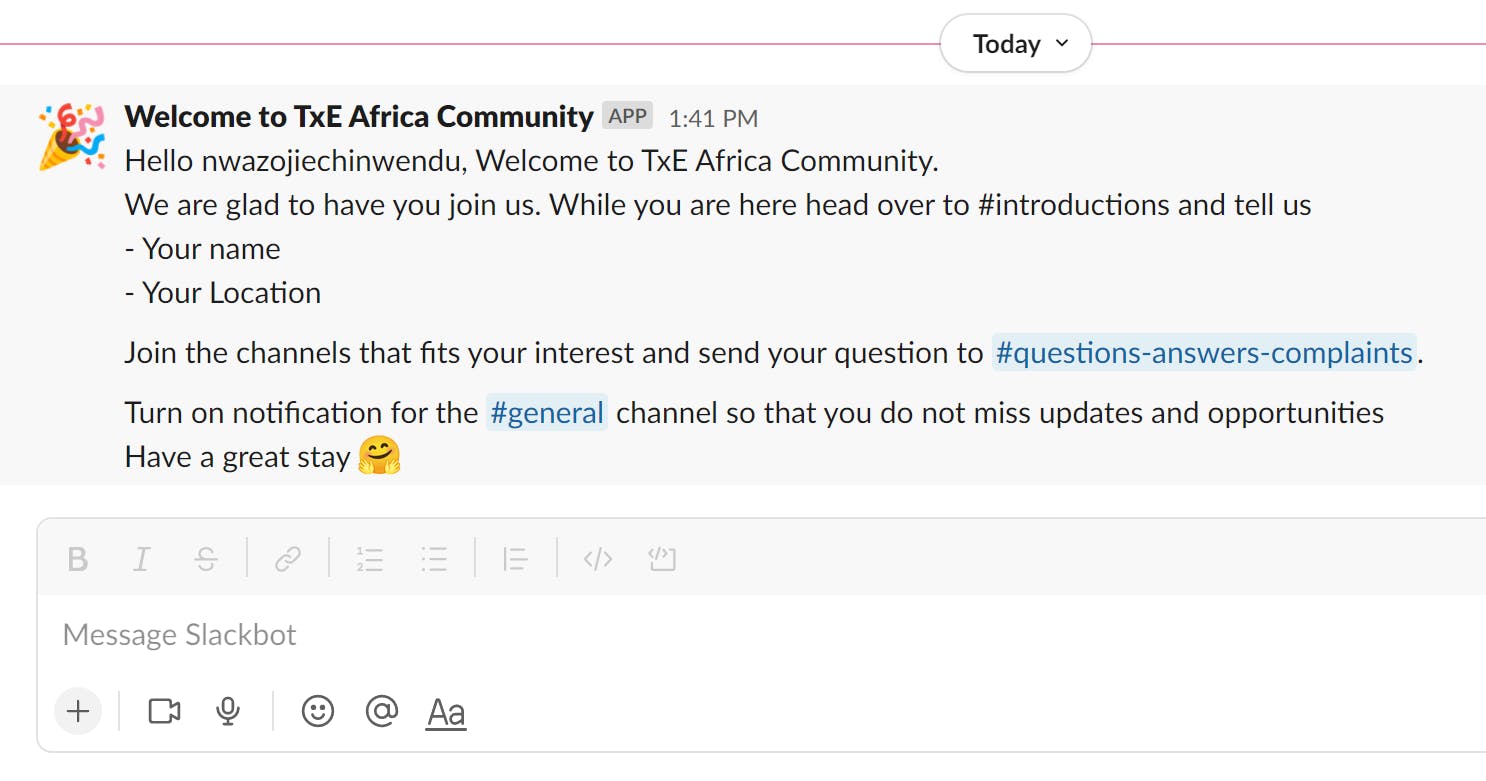
Screenshot of the zap we just created.
There is a lot more that can be achieved with Zapier. You can check out this article to learn more.
Do you have any other tips on online community management and onboarding? What other parts of community management do you think can be automated? Feel free to drop a comment; let's learn from you. 😀
Feel free to share this article with your friends.